Yocto for Cubieboard in QEMU - Step-by-step
- 21 Apr, 2024

In the previous post Ubuntu was used as root filesystem. Using Ubuntu as root filesystem is simple and fast to use, but it also has a lot of packages which are not necessary.
In this post I will cover the Yocto setup for Cubieboard. Using Yocto we will be able to build a custom distribution which will allow us to run Linux.
Items that will be covered are
- Yocto introduction
- Base Yocto setup
- Distribution configuration
- Machine configuration
- Linux kernel recipe modification
- Image recipe
- Networking recipe
- Building and running images in QEMU
- Summary
Sources for the Yocto build environment for Cubieboard can be found in following repositories:
- https://github.com/straxy/qemu-sunxi-yocto - manifest repository used to initialize Yocto environment
- https://github.com/linux-sunxi/meta-sunxi - official sunxi OpenEmbedded layer for Allwinner-based boards
- https://github.com/straxy/meta-mistra -
meta-mistralayer, containing all our changes -kirkstonebranch
Yocto introduction
Yocto is tool used to build Board Support Package (BSP) and Linux distributions, especially for embedded targets. It is very configurable and provides fine grained control of output images.
The project is organized into layers and applications that can be built are described in recipes. Configuration for a build depends on selected image, machine and distribution, as well as local configuration parameters.
For more details about Yocto Bootling Yocto training slides can be used.
Base Yocto setup
As stated previously, the base repository holds the manifest file and base configuration.
The manifest file describes all the layers that are used in the project. In this case only ‘kirkstone’ branch is selected, but selection can be made on a specific commit.
<?xml version="1.0" encoding="UTF-8" ?>
  <manifest>
  <default sync-j="4" revision="kirkstone"/>

  <remote fetch="git://git.yoctoproject.org" name="yocto"/>
  <remote fetch="https://github.com/straxy" name="straxy"/>
  <remote fetch="https://github.com/linux-sunxi" name="sunxi"/>
  <remote fetch="https://github.com/openembedded" name="oe"/>

  <project name="poky" remote="yocto" revision="kirkstone" path="sources/poky"/>
  <project name="meta-openembedded" remote="oe" revision="kirkstone" path="sources/meta-openembedded"/>
  <project name="qemu-sunxi-yocto" remote="straxy" revision="main" path="sources/base">
    <copyfile dest="setup-environment" src="scripts/setup-environment"/>
  </project>
  <project name="meta-sunxi" remote="sunxi" revision="kirkstone" path="sources/meta-sunxi"/>
  <project name="meta-mistra" remote="straxy" revision="kirkstone" path="sources/meta-mistra"/>

  </manifest>
The poky and meta-oe layers provide base applications and images, which can be extended by the higher-level layers,
like meta-sunxi.
The setup-environment script is used to initialize a build environment. Part of it initializes the bblayers.conf and
local.conf based on the input files in the templates directory.
Machine configuration
Machine configuration for Cubieboard is in the meta-sunxi layer, in the conf/machine directory.
Machine has definitions of output images that should be built, as well as parameters for U-Boot and Linux kernel. This way, differences between machines can be kept in separate files and same distribution can be used for different machines.
Distribution configuration
Distribution configuration for our custom distribution is in the meta-mistra layer, in the
conf/distro directory.
The distribution that is configured is the framebuffer distribution which disables all graphical backends, like X11, Wayland, Vulkan. This way the compilation time and final image size will be reduced.
In the distribution specification the systemd will be selected as the init manager.
This distribution can be selected at compile time by passing mistra-framebuffer to the DISTRO variable.
Linux kernel recipe modification
Linux recipe is stored in the recipes-kernel.
Since meta-sunxi layer already has everything configured in order to compile Linux for the Cubieboard, in our example
we will have a .bbappend recipe, to select extra configuration for AXP209 PMIC to be included (not included by default
from meta-sunxi). QEMU can emulate AXP209 for Cubieboard, so we can confirm that it is working.
Image recipe
Image recipe is stored in the recipes-extended/images directory.
The image recipe includes the core-image-minimal image settings supplied from Poky. One thing that will be different
from the core-image-minimal image will be the addition of lighttpd package. This way we will be able to serve a
static webpage over the network interface.
The lighttpd recipe is thus updated with information about the path where our custom html page is located. For the
name of the file, the
index.html.lighttpd
is used, since that it will be copied by the default lighttpd recipe to /www/pages/index.html on the target root
filesystem.
Networking recipe
Since systemd is used, the network configuration can be specified in the eth0.network file. This file will be used
by systemd-networkd to configure networking.
The file specifies the static IP address and DNS information in the same manner it was done in the previous post. It is added to the image by adding information about it to the systemd_%.bbappend file, which is an add-on to the original systemd recipe.
Building and running images in QEMU
Prerequisites
Before Yocto image can be built, several packages must be installed:
sudo apt-get install gawk wget git-core diffstat unzip texinfo \
   gcc-multilib build-essential chrpath socat cpio python3 \
   python3-pip python3-pexpect xz-utils debianutils iputils-ping \
   python3-git python3-jinja2 libegl1-mesa libsdl1.2-dev pylint3 \
   xterm
Tip
For details consult Yocto reference manual
Preparing environment
In order to prepare for a build, the manifest repository must be used
with repo tool.
repo init -u https://github.com/straxy/qemu-sunxi-yocto -m default.xml
repo sync
After the repo is initialized and synced, all recipe sources will be in the sources directory. Two additional
directories will be created, downloads, where archives and git repositories with sources for packages are downloaded
and kept, and sstate-cache where intermediate build products for reuse will be stored during the build process. The
sstate-cache directory can speed up rebuilds, or different flavor builds, since packages that are not changed will be
reused.
The next step is to initialize the build environment
source setup-environment <build_dir>The <build_dir> is custom directory where build will be performed and output files stored. After this command is
executed current directory is automatically changed to build_dir.
Building and running images
The build is started using the following command
# build command
DISTRO=<selected_distribution> MACHINE=<selected_machine> bitbake <selected_image>
Once build is completed, output image will be placed in
<build_dir>/tmp/deploy/images/<selected_machine>/<selected_image>-<selected_machine>.sunxi-sdimg. This is the SD card
image which can be either copied (dd) to an SD card image created with qemu-img, or can be just resized using
qemu-img to a power of 2 size.
There will be also other build products, like u-boot binary (u-boot.elf that can be used for running QEMU), linux
kernel binary, etc.
In our case, we will use build_fb as build directory, mistra-framebuffer as DISTRO, cubieboard as MACHINE, and
mistra-image as image, so the commands would be
source setup-environment build_fb
DISTRO=mistra-framebuffer MACHINE=cubieboard bitbake mistra-image
After the build is completed, the output image has to be resized using qemu-img to a size that is power of 2, in order
to be able to use it with QEMU
export YOCTO_IMAGE=${PWD}/tmp/deploy/images/cubieboard/mistra-image-cubieboard.sunxi-sdimg
qemu-img resize ${YOCTO_IMAGE} 1G
Once the SD card is ready, QEMU can be started using the following command
# Run QEMU with SD card and networking
qemu-system-arm -M cubieboard -m 1G \
                  -drive file=${YOCTO_IMAGE},format=raw,if=sd \
                  -net nic -net tap,ifname=qemu-tap0,script=no \
                  -nographic
[ ... ]
[ 0.521729] axp20x-i2c 1-0034: AXP20x variant AXP209 found
[ 0.536791] axp20x-i2c 1-0034: AXP20X driver loaded
[ ... ]
Mistra FrameBuffer 4.0 cubieboard /dev/ttyS0
cubieboard login:The log shows that the AXP20X driver has been loaded, so additional kernel config has been applied.
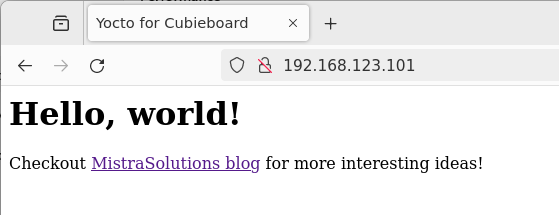
The network will be started automatically, and the static webpage that is served can be accessed at 192.168.123.101.

Summary
In this post instructions for using Yocto with Cubieboard were shown. Yocto provides an easy way to have a reproducible build, which is also optimized since only the necessary items will be included in the build system. Since QEMU Cubieboard supports SD card boot, that has been used for testing.

